
New Features of Course Pages and User Profiles
- Starting this year you are the "author" of your course offerings on the QED website. You can go to the page of your course by clicking in the timetable or from the "Courses Taught" part of your user profile page.
- The page for course offerings has more features than before as listed below.
These features duplicate what you would put onQ, but as the course page is available publicly it can help staff and students not yet enrolled. Using onQ alone for grad course info is problematic because enrolment does not occur until week 2 of the term.
[Screenshot videos for how to things are available here(soon!) ]
- TAs can be now listed (if added by you or your secretary or the Grad Assistant). You can ask for a TA to be made the course Author so they can edit it for you. TA assignment will appear on the student's profile just as teaching assignments appear on our profile.
- You can now set weekly office hours for yourself which will appear on your profile. TAs can also set office hours [Soon your hours and TA hours will appear on your courses as well.]
- As the course author you (or your secretary) can:
a. Attach PDF files directly to the course offering page.
b. Create a User Page and associate it with the course. It will appear both on your profile and course page. [see explanation posted earlier below]
c. Add formatted text to the "Body" of the page. This text will appear on the page.
d. Add links (called "external teasers") to the page, such as links to the Teams Class, onQ class, Cloud storage folder, etc. [Explanation posted earlier below.]
- You (or your TA or secretary) can create Events and associate them with the course, such as midterms, review sessions, etc. [Explanation below.] Make sure to tick on "Internal" so your event does not show up on general event lists
Setting Up a Microsoft Team for Your Course [Updated March 19]
Created March 16, 2020. Updated: March 19
-
Download the Microsoft Teams app (or log in via browser)
- Set up a new team/group on microsoft teams for the class.
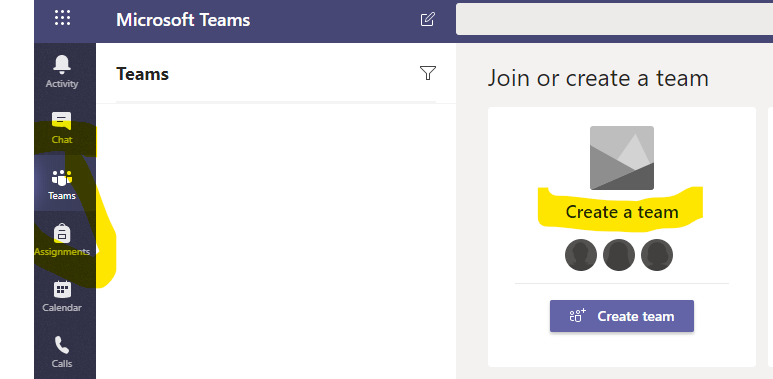
Setting up a class is one of the options when doing this. -
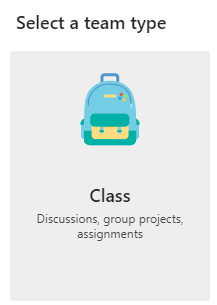
Select a Team Type
-
Two ways to let members join the team (the first creates a request that you have to approve; method 2 allows students with a code to join directly)
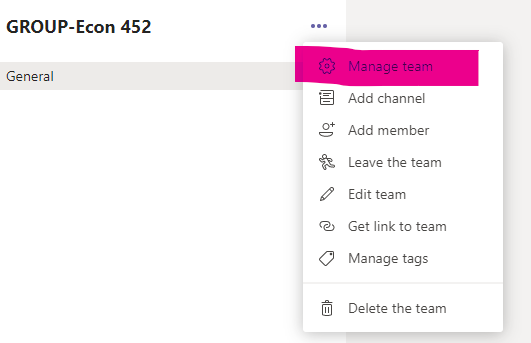
Method 1: Click on "..." next to the group on the leftside menu:
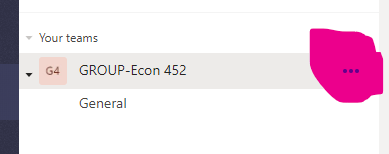
Now "get link to team" 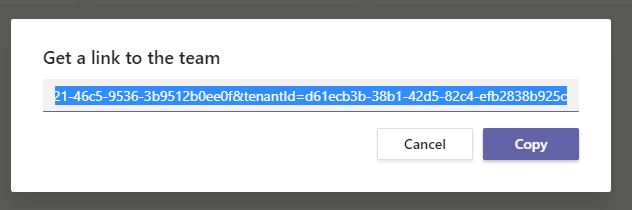
You can then share that link with your class. THey will have to login to their Queen's 360 account but should then be able to join the team themselves (have not confirmed yet myself...)
Method 2: Click on Manage Team
Select Settings and then Team Code
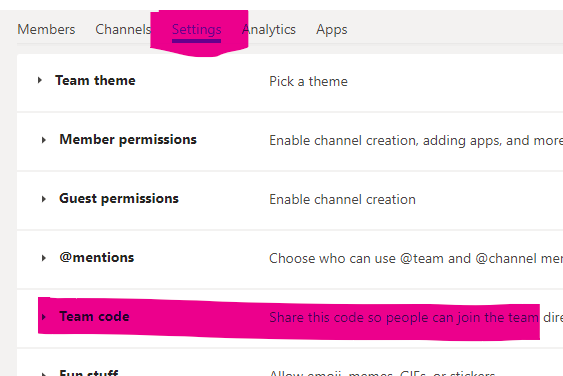
Share the code with the class, and point them to the "discover" page for teams: https://teams.microsoft.com/_#/discover
Creating a Meeting in Microsoft Teams
- Click on the Calendar on the left hand side menu.
- Over on the right hand size of the calendar, choose either to "Meet Now" or "New Meeting" which allows you to schedule a meeting.
- At class time, join the meeting.
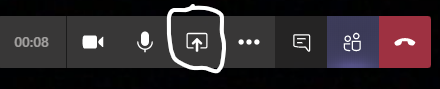
- Presenters can share their screens and/or presentations with the group. During the meeting there is a menu bar at the bottom. The share button is in the middle: That gives you the option to share the whole desktop or a window and other items
Creating and Uploading Video Content for Teaching
Creating Video Content
To create a "screenshot video" with optional audio and camera input, I suggest Screencast-o-matic. I paid for the yearly subscription, but the free version might be all you need. If you are new to this, the basic idea is the following:
- Download & install the capture software.
- Open what you want to display on your screen (as if you were projecting)
- Start the capture software, select the area of the screen to capture
- Test your microphone input, set up your camera if you wish, set capture quality, etc
- Start recording. Everything in the capture area is recorded like a movie along with the other input (your voice and camera)
- Stop recording, Then edit (if available in the version) and render the video (Save) as a MP4 file. This can take 15 or 20 minutes for a long, hi-resolution capture.
- Upload the MP4 file
Uploading Video Content
- Probably the best place to put online video is on the Queen's Streaming Service (QSS). Any faculty member can have an account.
- You upload the file, which is then rendered again (takes a few minutes) and is then in your library. You can then Publish the video to make it available.
- You can do some editing of the video there and you can limit access by password or URL (say, must be on campus or logged in via Queen's VPN).
- You can share a link onQ or by email to students.
Accepting Assignments Online
Besides accepting documents by email or onQ, grad courses can accept assignments on our website. Grad student logs into their QED account and creates a "student paper," uploads a PDF (or some other file formats) and associates the paper with the course. The instructor or TAs would have access to the paper. (Some details have to be worked out,.but if you are interested in this possibility you can
onQ Quizzes and Chat
An onQ quiz can be used to ask students different types of questions, including open-ended ones that they type answers to. They can be scheduled, timed, questions randomized across students, etc.
The onQ "chat" can be used to take typed questions from either any student or a closed set of students.
Getting more control of course, workshops, events.
[October 2019]
When the website was set up it provided very limited ability for department members to create and modify content they were associated with. In looking at ways people are using the site I have made changes so that it easier to use it in some ways.
First is the ability to link some content to a course you are teaching (the note above this one).
Next, members of the department now have the permission to edit all content that they "own" (the Drupal term is author not own). But you don't own most content you are associated with. However, staff and website administrators can transfer ownership of a content item to you and then you can edit it. There are things you should not change about items such as a course you are teaching, the workshop you are organizing, etc. But this makes it easier to attach files to pages or edit text of a page.
In addition, department members now have permission to create some types of content, including events, webforms, etc.
To see what content your account has permission to create, go to /node/add.
To ask for help with content, the best method is to fill out this simple form
Associating Content with Courses You Teach
You can now associate "user pages" and "events" with a course you are teaching. Explanation follows:
Pages (syllabus, reading list, etc).
Some instructors create documents for their courses as "user pages" on their qed profile. Until now, those documents did not also appear on the course offering page. Now you can create or edit a user page and associate it with an offered course. It will then appear there as well as your own user profile page. (This does not apply to attaching a PDF file to the course. To do that yourself you have to become the owner of the course offering ...)
To link an existing page to a course:
- log in to your qed profile: /user/login
- Go to the course related user page you created earlier.
- Below the title you should see "Edit" (if not someone else created the page for you ... ask to become the owner or have that person do this).
- Click on "Edit" and scroll down near the bottom. You will see a new field "Course Offering." Start typing the course name "Econ XXX ..." in the box. As you do existing course offerings will appear. Find the one that you are teaching (currently no check that you are actually the instructor, so please select carefully!)
- Click "Save" at the bottom. You can then go to the course offering page (might have to reload it). You should see both the title and a "details" link that will display the whole document in place there.
If you want to create a new user page for a course, go here: /node/add/user_page
An example of a user page appearing on course: /about/courses/course-list/econ-815-macroeconomic-theory/econ-815-winter-2020
Also note that the page will include a link to the course offering at the bottom, so now Instructor - Pages - Courses are all interconnected.
Events:
You can also associate events with a course offering now just like workshop presentations. The process is similar to the steps above except you create an event here: /node/add/event
However, remember that Events can appear on the homepage and other locations which you probably don't want to happen for a course event. To prevent that from happening you should click "Internal" near the top of that creation page. It will still appear on some calendars. Then near the bottom of the creation page you will again see "Course Offering." Do the same thing and SAVE. The event will now appear on the course offering page.
Here is an example of events associated with a course offering:
/about/courses/course-list/econ-999-phd-thesis-seminar/econ-999-fall-2019-section-3
Upcoming events calendar, feeds, etc.
[October 19]
News, events and calendars are still getting organized, but here is some help.
- The monthly calendar of events is still available here:
https://www.econ.queensu.ca/internal/icalendar
However, the big "calendar" link under internal has been removed because a bug that has not been resolved yet. There is a link to the monthly calendar at the top of the "internal page" Or you can just bookmark that link and go directly to it.
- If you use a RSS service, you can 'subscribe' to a feed that lists upcoming events and current news items.
The feed link is below, which you would point your RSS reader to (clicking on it a browser does not work).https://www.econ.queensu.ca/news-events-feed.xml
- Other ways to show upcoming events are being worked on.
Using External Teasers (links) on pages
If you create a "Page" or other types of content you will notice on the form the ability to add "External Teasers" to your page. Those are simply links to other web content. It could be to a different page on the QED website or a link to an external page.
You can use URL links in text like this to do the link. The difference is that an external teaser will show the links you more like a menu. And you can add an image to the teaser link which makes it look like other menu-page links on the QED website. Images are optional.
Click on the link below to watch a screenshot of how to add external teasers to a page: Screen Shot Tutorial of Adding External Teasers to a Page
Of course, you have to be logged in to your profile to create or edit pages.
User Pages Now Have Attachments
You can now attach files to user pages. If you want to attach a file to an existing page, log into your account, find the page and then click on Edit at the top. Scroll down the form and near the bottom you will see the "File" section where you can upload files. Links to the files will be displayed on the page when you save it.